
Finally the much awaited CentOS 7 is out. CentOS (Community Enterprise Operating System) is forked from RedHat Linux, a Linux Distro fine tuned for servers.
In this article you will learn how to install CentOS 7 in a few easy steps.


Installation will begin immediately and as it proceeds you need to set up a User account as well as the root password.


It also comes with Gnome Classic for those that want the look and feel of Gnome 2.

CentOS 7 comes with GRUB 2 which solves dual booting problems with other Linux distros that have been using GRUB 2, like Ubuntu. This is an improvement from CentOS 6.5 which used GRUB Legacy and was a problem when dual booting. Now you can do your installation without concerns of GRUB issues.
CentOS 7 has support for the xfs file system which is suitable especially in a distributed type of environment. XFS is known for its ability to handle parallel I/O compared to ext4.
CentOS 7 will also be shipping with MariaDB, a replacement for MySQL.
In this article you will learn how to install CentOS 7 in a few easy steps.
Step 1: Download The ISO Image
To get a copy of CentOS 7 download from its source mirror.
CentOS 7 is now shipping for 64 bit platforms, and currently there is
no 32 bit ISO image. This is primarily due to the fact that most servers
in production are 64 bit.
Step 2: Make A bootable Drive
After you have downloaded the ISO image,
make a bootable USB drive. Since Centos 6.5, you can create usb drive
bootable by simply transferring iso file to usb using dd command. Win32DiskImager is an alternative solution as we found Unetbootin no longer works for CentOS 7.
# dd if=/iso/CentOS-7-x86_64-DVD-1602-99.iso of=/dev/sdb* /dev/sdb is the usb device and make sure you have atleast 4.3 GB space.
Step 3: Begin Installation
To begin installation, click on the Install to Hard Drive icon on the desktop.
Step 4: Select Language And Keyboard
Select your preferred language as well as the Keyboard type you have. Take care not forget to choose the correct keyboard or else you will end up with a few scrambled keys.

Step 5: Change The Installation Destination
By default the Anaconda installer will
choose automatic partitioning for your hard disk. Click on the
Installation Destination icon to change this to custom partitioning.

Click on the hard drive you want to install CentOS 7 and under the Other Storage Options, choose I will configure partitioning then click Done.

Step 6: Select The Partitioning Scheme
Next select the partitioning scheme to use for the mount points. In this case choose Standard Partition.

Step 7: Create A Swap Space
You can create a swap space from one of the partitions and set the desired capacity, which is dependent on the RAM you have. Choose the File System for swap space as swap, and click on Reformat, though reformatting is optional. You can also name your swap space to whatever name you like but a name like swap is more descriptive.
Step 8: Create A Mount Point
The next step is to create a mount point
where the root partition will be installed. Depending on your
requirements you might need to put the boot, home and root partition on
different mount points. For this case we shall have only one mount point
/.
After this set the Label and Desired
Capacity to whatever you wish. A rule of thumb is to use descriptive
names for the Label especially if the computer is to be used by
different system administrators.
Choose the file system as ext4 and click on reformat.

Step 9: Accept Changes
After completing Step 7 and Step 8 successfully click on Done button. A prompt window will appear with a summary of changes that will take place. If you are satisfied with them click Accept changes.
Step 10: Set Date And Time
Click on the clock icon under the localization menu and select a time zone from the map of the world, then click Done.
Step 11: Begin Installation
Now after configuring the System and Localization settings you can click on the Begin Installation button.
Installation will begin immediately and as it proceeds you need to set up a User account as well as the root password.

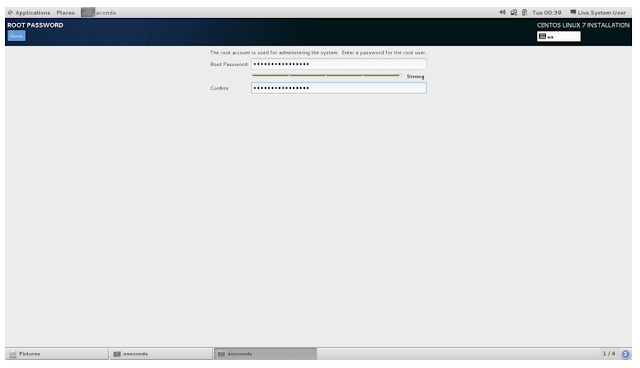
Step 12: Set Up Root Password
Click on the root password option and enter a password and confirmation of the same then click Done.

Step 13: Create a User Account
The next step is to create a user account. Enter the correct details and if this is the administrator account, tick Make this user administrator and Require a password to use this account for security purposes.
Step 14: Complete Installation
The installer should complete installing the software and the bootloader.
Once complete you should get a success message, after which you can click quit.
Logout from the Live system and login to your new installation.
Finally once you login to your CentOS 7 accept the EULA agreement and enjoy!Logout from the Live system and login to your new installation.

New Features in CentOS 7
The following are some of the notable feature in CentOS 7:
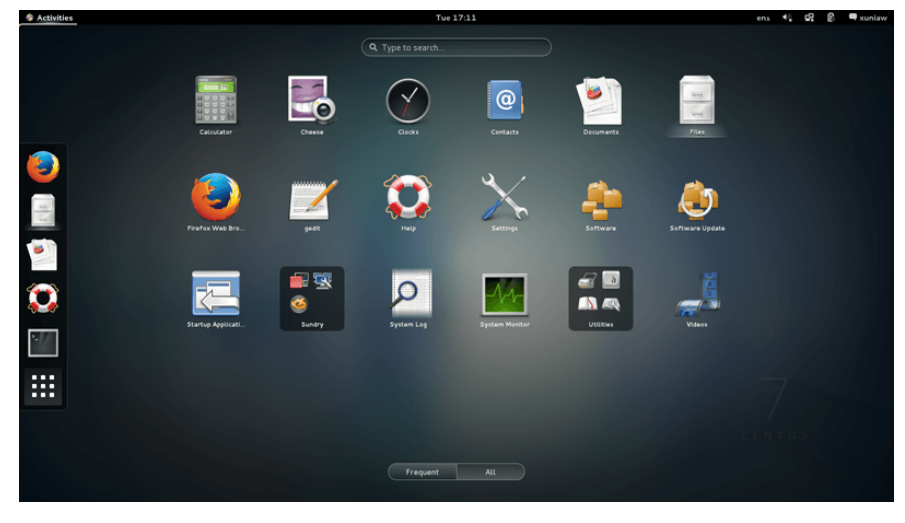
Gnome 3 Desktop Environment
CentOS 7 comes with Gnome 3 which is very convenient when you have a touch screen.

CentOS 7 comes with GRUB 2 which solves dual booting problems with other Linux distros that have been using GRUB 2, like Ubuntu. This is an improvement from CentOS 6.5 which used GRUB Legacy and was a problem when dual booting. Now you can do your installation without concerns of GRUB issues.
CentOS 7 has support for the xfs file system which is suitable especially in a distributed type of environment. XFS is known for its ability to handle parallel I/O compared to ext4.
CentOS 7 will also be shipping with MariaDB, a replacement for MySQL.
Conclusion
CentOS 7 has greatly improved from
version 6.5 and now is easier to adopt it as a Desktop OS compared to
its predecessor. For those that probably cannot keep up with Fedora
releases every 6 months, CentOS 7 is a good consideration. Try it out
today!


No comments:
Post a Comment